Optimizing Images for Web
Although computers have been a business staple for nearly 30 years now, the drastic differences between web and print still remain. If you were optimizing an image to be printed on a poster, for example, you would want the file to be fairly large and full of detail. Depending on the printer, there are specific color profiles and file types that need to be used.
An image for a website, however, requires a completely different set of standards. In order to minimize page load time, image files need to be small, yet still detailed. Web images have a completely different color profile, resolution, and even file type from their printed counterpart.
Even the best designers can find all these variables tough to juggle. Fortunately, tools like Photoshop have evolved over the years to make the conversion process as painless as possible.
In this tutorial, I am going to show you how to efficiently resize an image for web using Photoshop CC. Please note that menu locations and hotkeys may differ on PC, Lennox, and mobile versions of this app.
Cropping & Resizing
Start with the crop tool. (Note that there is a shortcut to adjust the image size from the ‘Export As’ window, but I have found that feature tends to be buggy.) Starting with the crop tool minimizes chances of distorted proportions and app crashes.
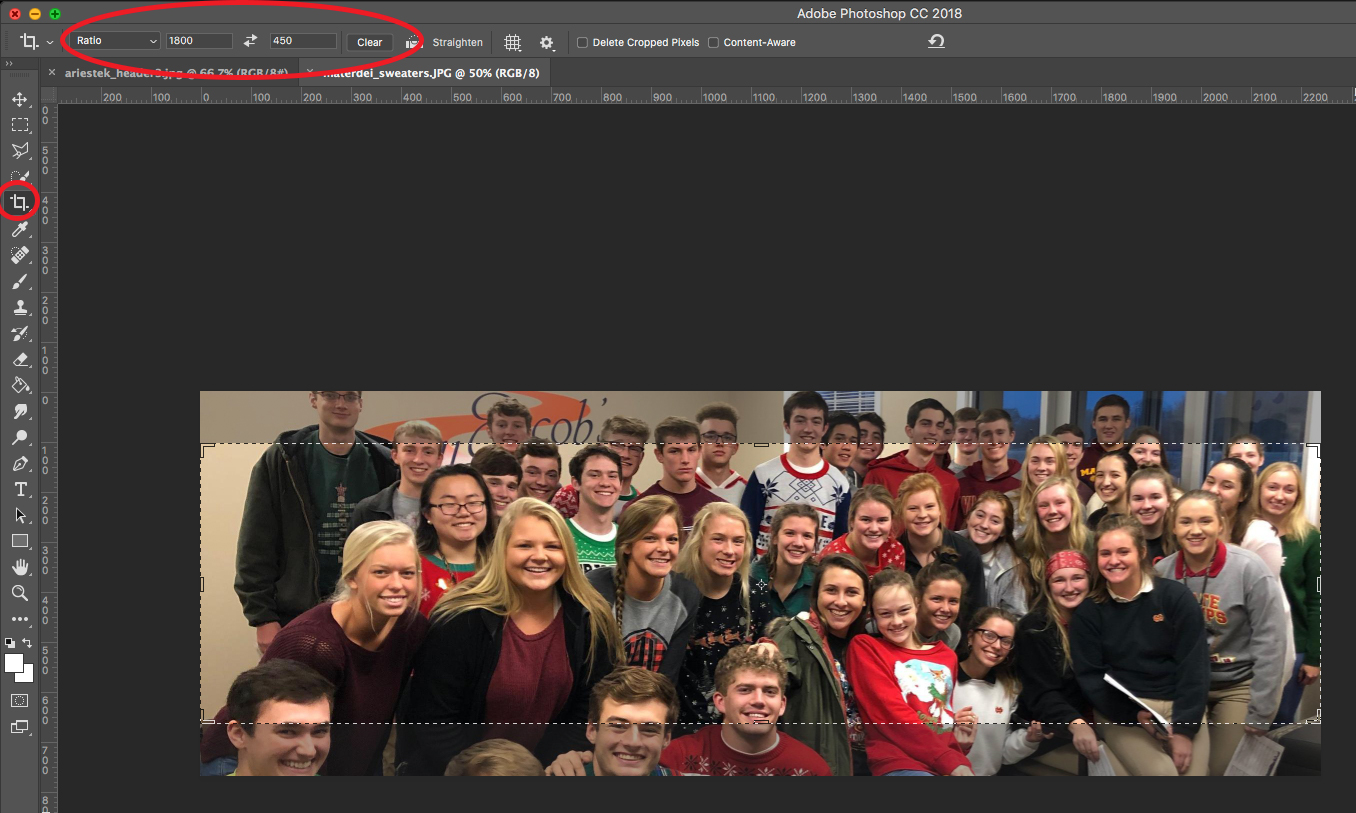
Open your image in Photoshop and select the crop tool (hotkey: c). Then set your ratio to the desired dimensions for your image. The dimensions in today’s example are 1800×450.
Click and drag anywhere on the image to select the area you’d like to crop. You can adjust the size of the box by clicking and dragging the corners. The arrow keys can also be used to nudge the image into place.
Once you have the image centered how you’d like, hit the enter key or click the checkmark in the upper right-hand corner (not displayed in this screenshot)
NOTE: The image may now be the correct aspect ratio, but Photoshop most likely has not resized your image to the exact pixel dimensions you entered.
Verifying Image Size
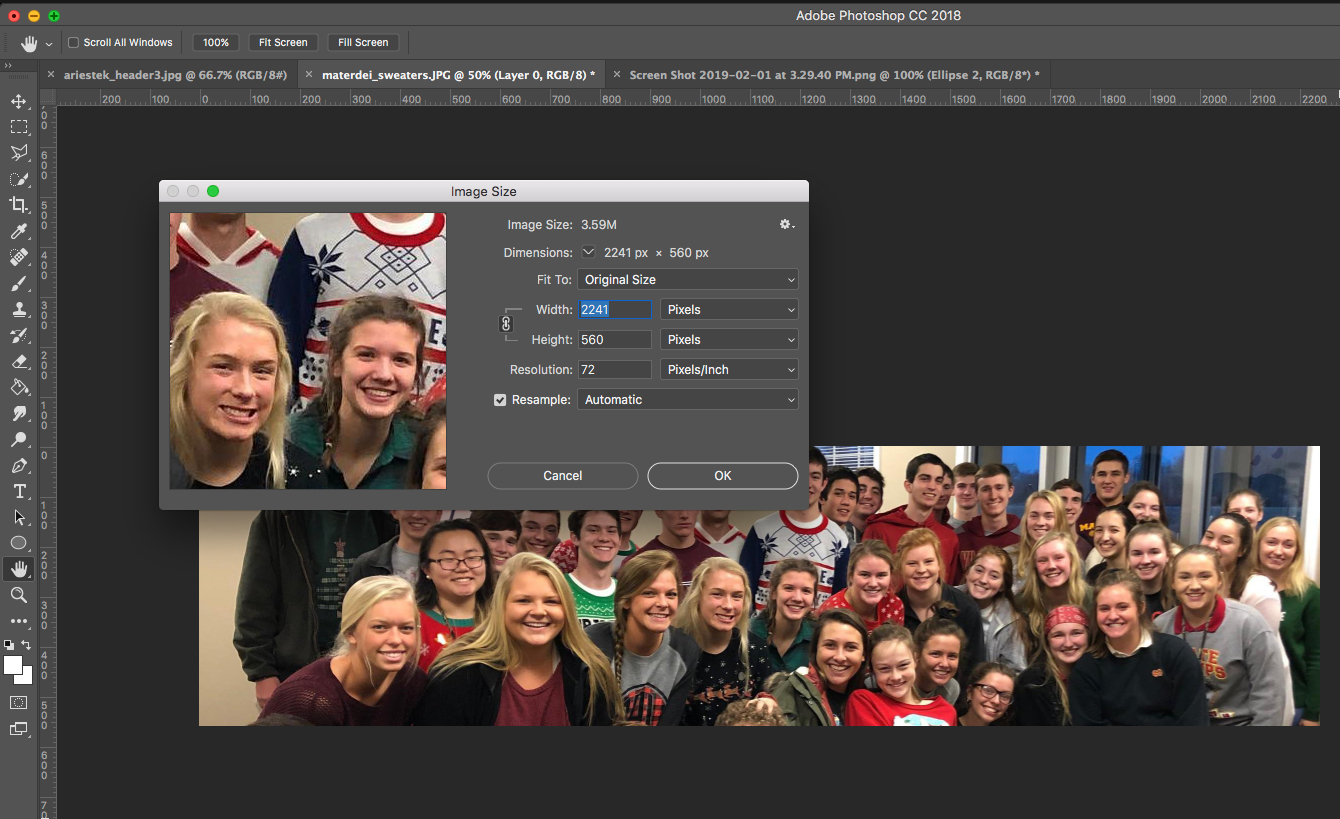
To check, go up to the main navigation, click “Image” and choose “Image Size…”
(hotkey: ⌘ + option + i)
As suspected, the newly cropped photo is still too large. Instead of using exact dimensions, Photoshop has only cropped the image to the correct aspect ratio.
Enter the correct width (in this case 1800) and as long as the aspect ratio is linked (the little chain icon to the left) the height should automatically update as well. Click OK to exit the ‘Image Size’ menu.
Saving Images for Web
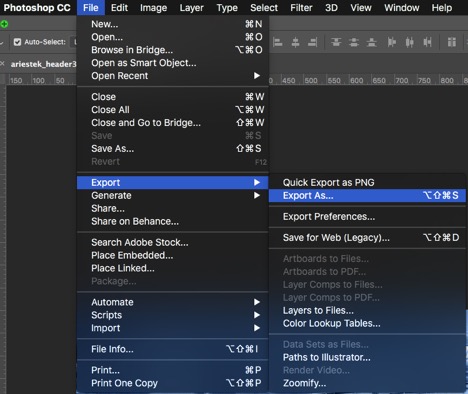
Go to File > Export > Export As…
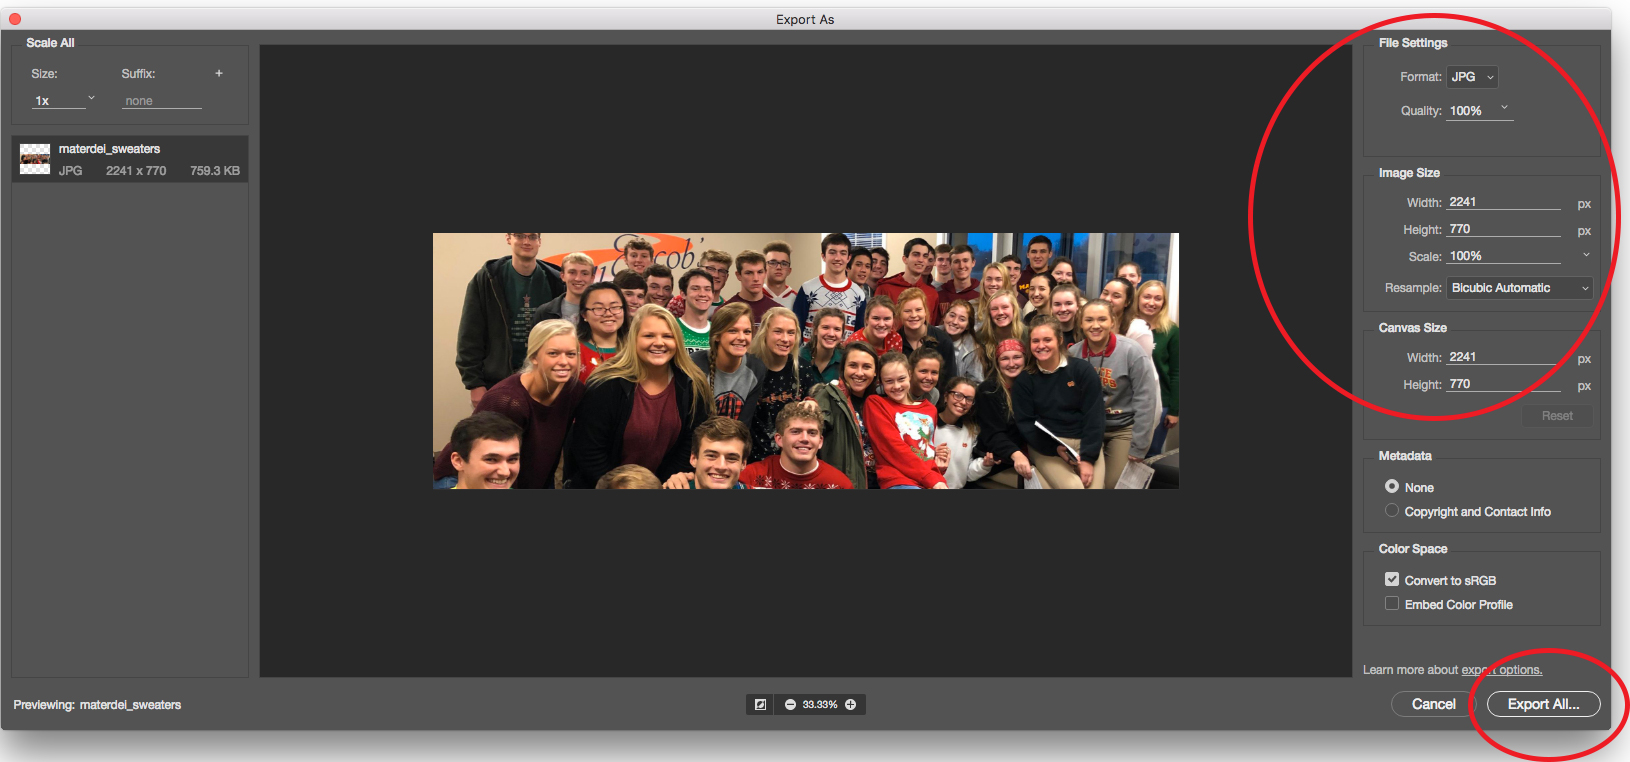
…and your ‘Export As’ menu will pop up. Take a look in the upper
The second to last step is to double check the image size. Click the “Export As…” button to save out your new image in the location of your choice!
*If an image is solid with no transparency (like the example above), always use a JPG for web. Images with any amount of transparency (represented by a checkered background) should be saved as a PNG. Moving images must be saved as GIFs and the SVG filetype is reserved for vector work.
Other Handy Tools
Sometimes you may run into a situation where an image is still too big, even after optimizing in Photoshop. This can be especially true with PNGs. Unlike with JPGs, the ‘Export As…’ menu does not provide the quality slider. Fortunately, there is an opensource app for that!
Let me introduce to you one of my favorite pieces of non-Adobe software: ImageAlpha. This PNG minifer is free, but only available for Mac.
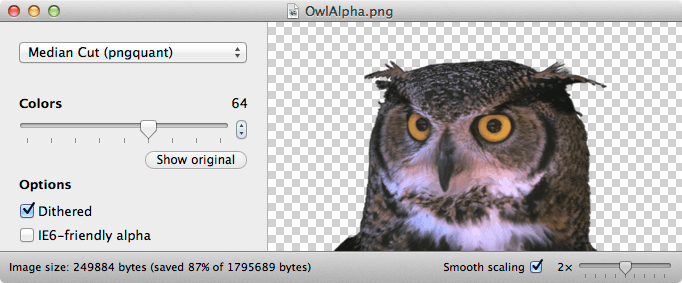
ImageAlpha also works in tandem with my other secret weapon, ImageOptim. A paid web service is offered, but as a Mac user, I prefer to use the opensource app.
Neither of these apps are available in the App Store at this time. This is due to Apple’s requirement for all users to accept DRM (copy protection), which the developers dislike. They would prefer their products to remain free and available for all. You can read more about the developers’ philosophies and download both apps from the official ImageOptim site.

