To be honest, before I came to Roundpeg, I never gave forms any thought. I often used them to submit an email and address or credit card information, but the information simply disappeared into the magic of the Internet. Somewhere there was a computer or even human being on the other end receiving the information, but I never really thought about what it was like to be on the receiving end of that type of transaction, until now.  We’re currently looking for a better solution to gather information from clients. In our search for a solution which makes it easy for clients to share and easy for us to retrieve information, we decided to kick the tires on Google Forms.  In general, Google products tend to be well thought out and pretty easy to use. The Google Forms product is no exception.  It is incredibly flexible, allowing easy customization and collection of a range of information. 

Thinking about giving Google Forms a try? Read this first. 

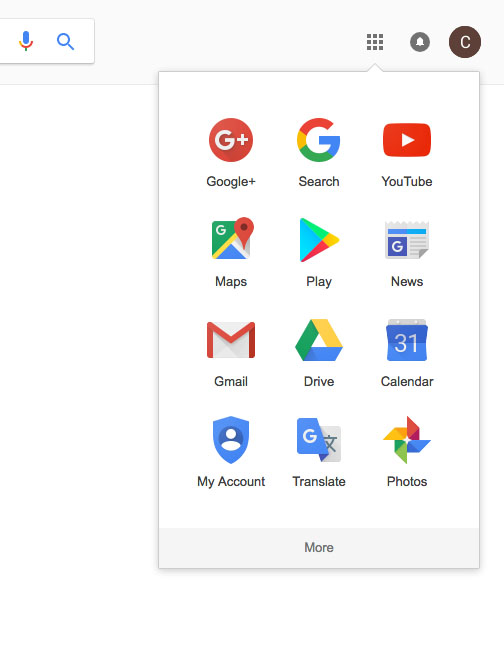
To create a form, log in to your Google account. Then, click on the grid of gray boxes at the top right of your screen (they may also be white, depending on your settings or image background).
Screen Shot 2017 05 29 at 5.28.30 PM copy
googleforms
Click the “More” link at the bottom until you see a purple icon labeled “Forms.” Note that whether you’re able to access Forms from that menu may depend on what kind of Google account you’re using. When I’m logged into my work account, it pops right up; when I looked for it through my personal account, I had to do a Google search for the application.
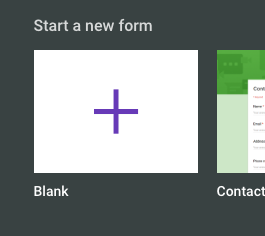
Great, you’re ready to make a new form! I love how simple and straight-forward this page is. Want to create a new form? Click right here. You can use one of the pre-designed templates. Just below are any forms you designed in the past. For this guide, go ahead and click on the plus icon, “Start a new form,” on the top left of your screen.
Screen Shot 2017 05 29 at 5.31.08 PM
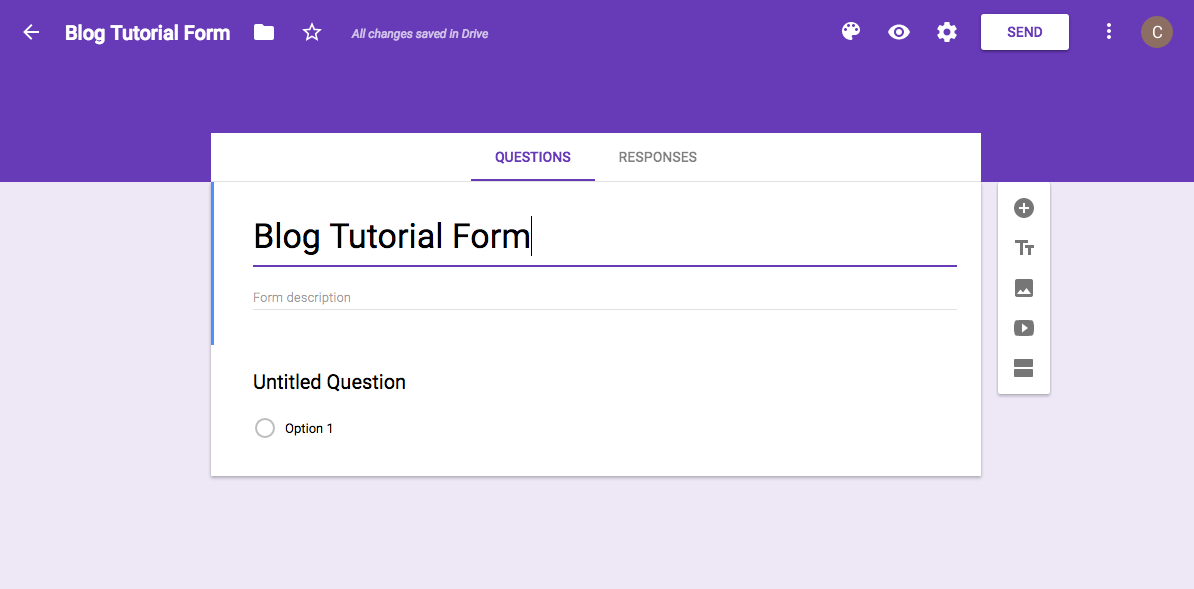
That will take you to a new form page. Right from the beginning, you can change the title of your form by clicking on either the white text on the top left or black text in the middle of your screen and typing.
Screen Shot 2017 05 29 at 6.14.22 PM
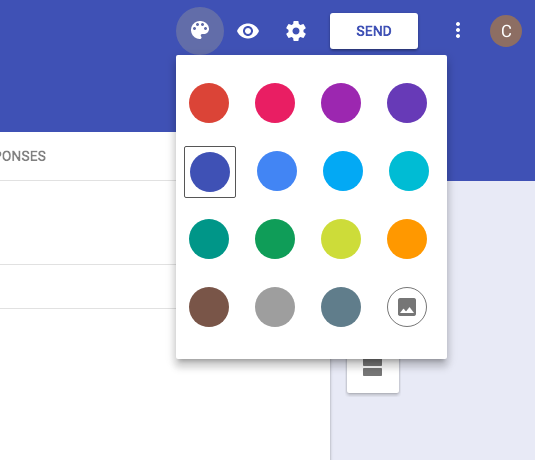
The purple’s a little much for me, so I’m going to change it to a darker blue by clicking on the painter’s palette at the top right and selecting my preferred color. If you want to customize your form even more, click the last circle with a picture icon which will allow you to upload your own branded images into the header of your form.
Screen Shot 2017 05 29 at 6.17.21 PM
Screen Shot 2017 05 29 at 6.24.05 PM
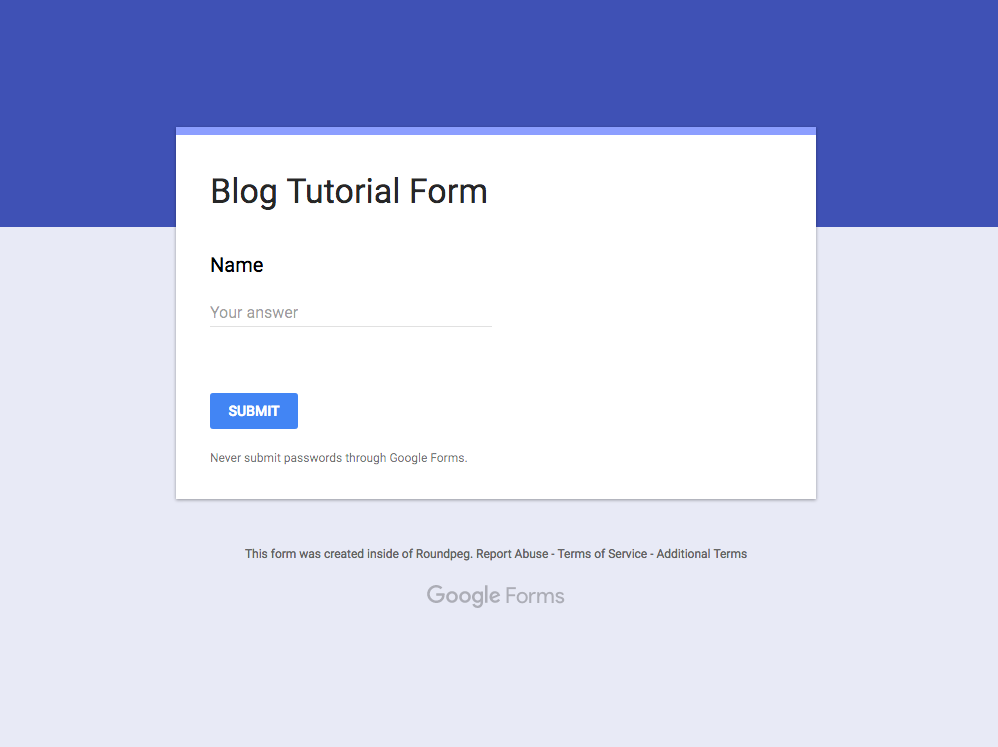
The eyeball icon next to the color palette opens up your form in a new window and shows you how it will look for someone filling out your form. From here, creating your form is mostly straight forward. In the white rectangle of your form, there’s a menu to the right of a couple buttons. The plus sign adds a question to a section, while the gray rectangles add a new section. The Tt icon adds a title to your section, while the image and “play” icons add images and videos to your question. I try to avoid adding images with text or copy; I uploaded a graph to my form because it was a visual aid, but illegible visual aids are useless.
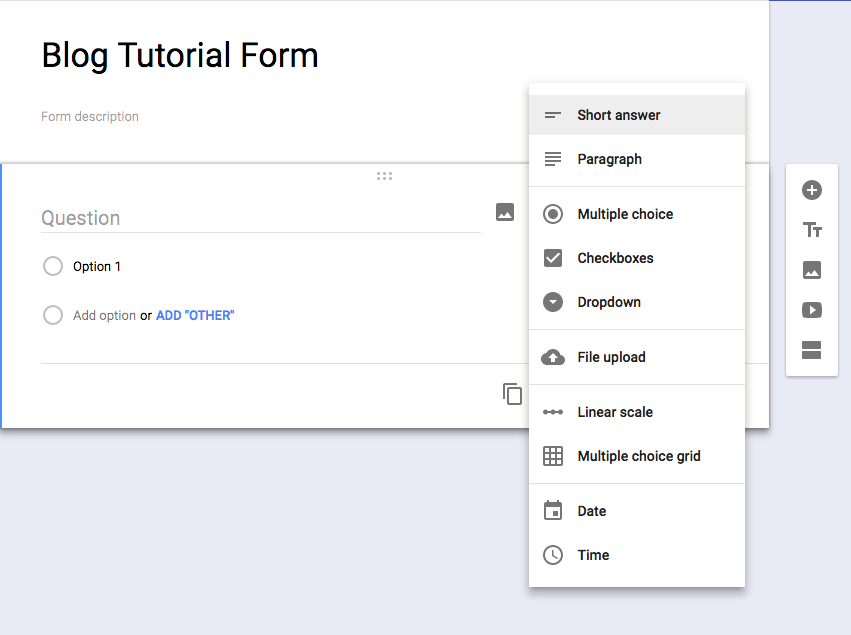
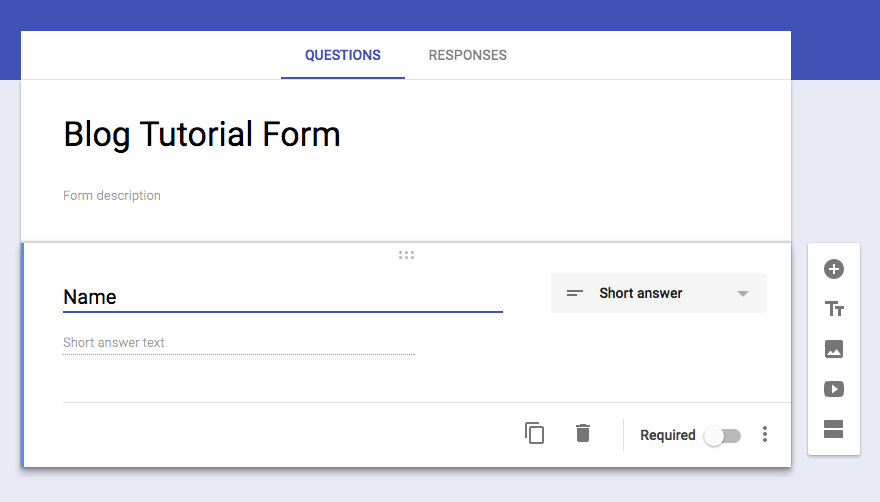
Time for the first question! Depending on the form, it’s usually best to start with asking for someone’s name. Click the gray box to the right of the question section and select “short answer.” The field to the left will say “Question.” Click on the text and type “Name.”
Screen Shot 2017 05 29 at 6.30.28 PM
Screen Shot 2017 05 29 at 6.31.28 PM
If you want to make sure everything’s as it should be, click the eyeball icon on the top right of your page.
Screen Shot 2017 05 29 at 6.33.06 PM
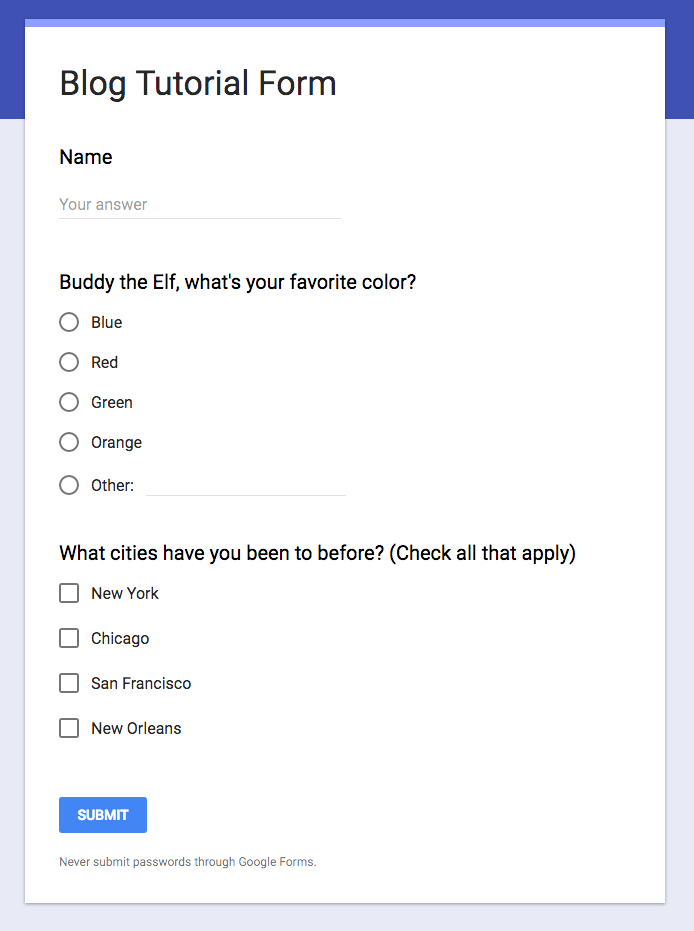
Looks all right to me! From there, it pretty much depends on what kind of information you need to collect. If you have another short answer question, you can click the double page icon at the bottom. Don’t think you need that question any more? The trash can icon will get rid of it. Want to make sure the recipient answers a question? Click the “Required” toggle. Be selective in using that option; sometimes requiring a question the recipient doesn’t want to answer means you won’t receive the form at all. For example, phone numbers are an increasingly protected piece of information, so you might not want to require it unless you really need it. Getting the questions in the format you need is a bit of trial and error unless you’ve done this many times before. Even then, it requires some thought and editing. Just try to remember what this looks like to the person receiving it; if you have a moment, ask someone who’s not connected to the project to take a look at your form and ask them if there’s anything that doesn’t make sense. One quirk of Google Forms is it tries to anticipate what kind of question you’re asking. Google’s pretty smart, but not quite that smart. It was a little annoying to change the type of question, but not really a big deal. My other main annoyance with Forms is while you can maneuver the questions around, the sections stay as-is, which if your form is pretty intensive could be super frustrating. For my purposes, duplicating sections by clicking the three vertical dots at the top of a section, fixing my errors and deleting unnecessary sections was the easiest way around that. Cool, you’ve got a form. Now you’ve got to get it to the people.
Screen Shot 2017 05 29 at 6.51.08 PM
Screen Shot 2017 05 29 at 6.52.22 PM
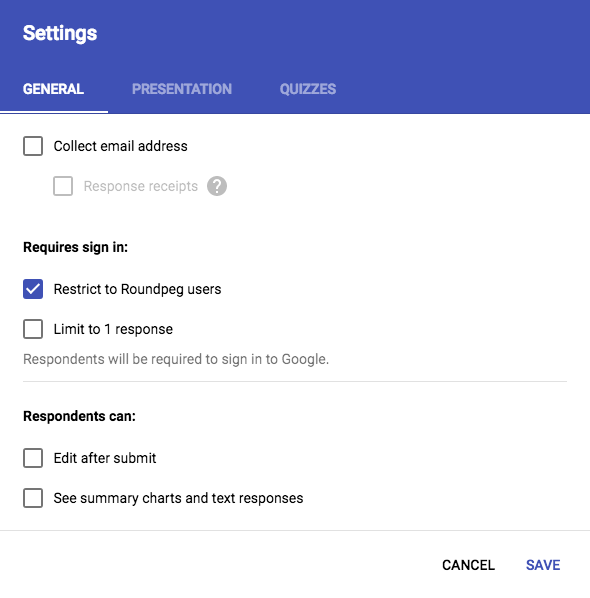
Click the gear at the top right of your page to configure who your form will be sent to.
From here, the settings are up to you. From my Roundpeg account, I can say that only my coworkers with a Roundpeg account can submit this form. They can also edit the from, which is great when the answers are necessary to different departments.
Screen Shot 2017 05 29 at 6.56.12 PM
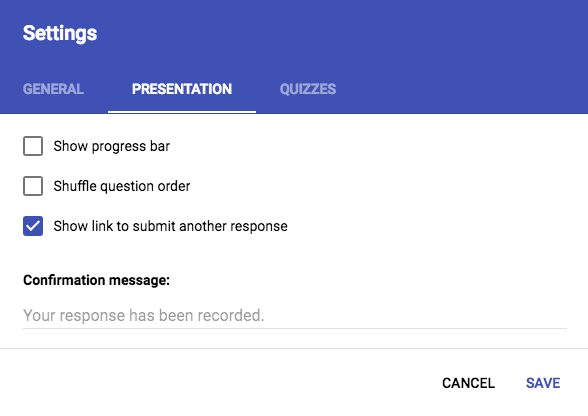
Clicking on the presentation tab gives you a couple more settings. A progress bar will let people know how much more of the form they have to complete before they’re done (I personally find these helpful, lets me know what I’m in for; if your form is rather long, you may want to include a progress bar.) The next two are up to you. I’d recommend editing the confirmation message to make it seem a little more personal, even though we all know it’s a robot thanking us for our time.  I didn’t look into the quizzes tabs much given that’s not what I use forms for, but it’s a nifty feature that’s probably useful for teachers or even internal training for your business. Or general trivia questions, cause why not?
Screen Shot 2017 05 29 at 6.57.48 PM
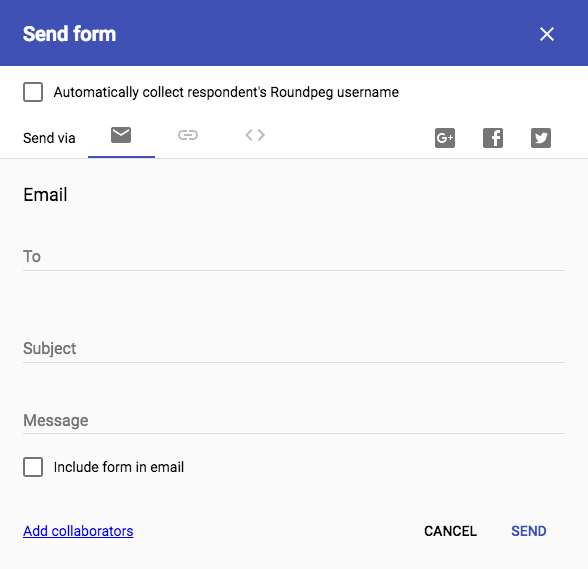
All right you’re almost there! Hit the white Send button at the top of the page. From there, you can choose to email the form directly with a personal message, get a short link to the form to put wherever you wish, as well as an embedding code to put on your website. The icons for social sharing are available, but it’s generally better to use a shortcode and customize your post for better results.
Screen Shot 2017 05 29 at 7.03.30 PM

Hooray, you did it! You at least scanned through this tutorial (congrats), or maybe you built your first form and shared it. That’s pretty cool too. Now just watch the responses roll in (or bug your coworkers to fill out that form, please and thank you.) You can view the results on an individual basis or hit the tab to view the aggregate results. 

One more thing to keep in mind: never, ever submit your passwords or other sensitive information in an online form. Don’t ask your respondents to either. Google Forms allows for password-protected access to Forms, but still. Best be keeping your secrets a secret. Also. If you ask for (and get) someone’s email, you can put them into your direct email marketing campaign to keep them coming back.

FREE Business Advice Delivered to Your Desktop.