There’s one thing that every web design I’ve done has. Every web design includes an online form. Whether it’s the basic contact form for sending a message to the business or a self-scoring personal assessment, forms are a basic part of every web design project.
Roundpeg uses Gravity Forms to design and create forms for our clients. Since we train each and every client to maintain and edit their own website, we also provide training to use Gravity Forms. Clients frequently ask for written instructions that follow our personal training times. While everyone’s site is different, these instructions produce a basic appointment request form useful for a wide variety of businesses.
Download and Install Gravity Forms
Gravity Forms is paid software you install on your self-hosted WordPress site. Sort of like installing an app on your smartphone. Plugins extend the core functionality of your website to include special features, like the Gravity Forms form builder. If you don’t already have Gravity Forms, go to the Pricing & Purchase page and choose a subscription plan. If your business has just one website, the Personal Plan works great.

Once you finish checking out, you’ll be able to download the software package to your computer. Then, log in to your WordPress website and mouse over the Plugins item in the sidebar navigation. Choose Add New from the pop-out menu. Click the Upload Plugin button near the top and follow the prompts to install and activate your new plugin. As you complete that process, Gravity Forms will prompt you to enter a license key. This string of numbers and letters will be sent to you via email after you purchase the plugin. You can also login to gravityforms.com and go to Support > My Account to find your license key.
Once your plugin is registered by entering the license key, you can make as many forms as you want. Let’s get started making our appointment request form.
Add a new form
We’ve already written about the basics of making a simple contact form. If you’ve never worked with Gravity Forms before, please read “Making a Form” to review the basic steps of adding name, email and phone number fields to a simple contact form.
In the next steps we will extend the process to include date preferences, options for requesting specific staff or services and a comments field. We’ll also go through how to setup smart email notifications that only send to the staff member selected on the form.
Now that you’ve added some basic form fields, it’s time get to fancy.

Add a date field
The name, phone and email fields are all found in the Advanced Fields option box. You’ll also find Date. Drag the Date box over to the form building area to add the field to your form. Click on the field to expand that individual field’s options. Your first step here is to change the Field Label.
Label this field something that suggests the action you want visitors to take. For example, “Requested Appointment Date” or “Choose your day”.
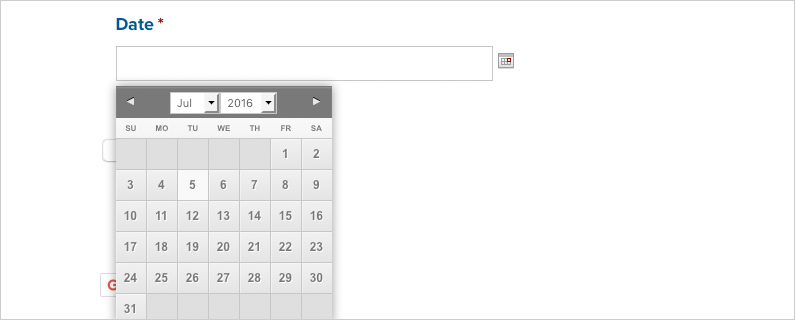
Next, make sure to choose the Date Input Type. Date Field lets visitors type the date in on their own. The Date Picker adds a mini-calendar they can click to choose their day. And the Date Dropdown turns month, day and year into dropdown menus. Don’t forget to set this field as required.

Other appointment request options
What if you don’t want visitors to select a specific day for their appointment? You don’t necessarily need to give them that control. Think about asking 1 or 2 simple questions that let visitors tell you their preferences. Morning or afternoon? What services are you interested in? Even “choose a staff member”.
Use the Checkboxes field to allow visitors to choose more than one of the options. Use Radio Buttons or the Drop Down field to force visitors to choose only one.
Add a comments field
There’s one more field you need to make the form complete. The whole point of the form is to let visitors easily send you a message with some basic details of their request. The basic fields we talked through above should take care of that. And all of those fields should be required too. But sometimes there’s just more to say than those fields can express. Rather than try to build a form with options for every possible response type, keep things short and sweet with your required fields. Then add a Paragraph Text field to allow for a free form answer.
Drag the Paragraph text field over to where you want it in the form builder. Change the field label to something like “Comments” or “How can we help?”
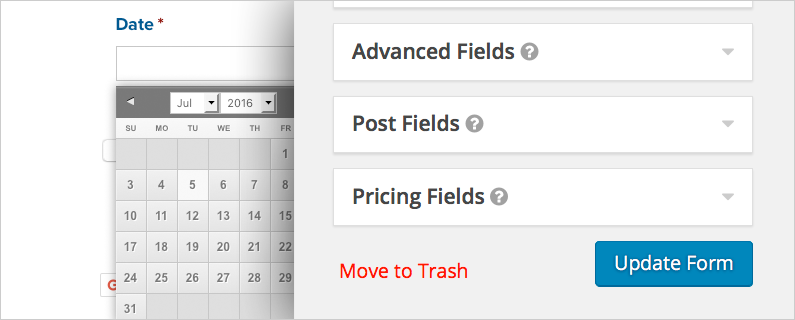
When you’re all done adding fields and building the form, make sure to click the Update Form button.

Setup email notifications
Before you finish up work on this form, it’s very important to finish setting up email notifications. This gets overlooked easily. By default, Gravity Forms uses the website’s admin email, found in your WordPress settings under General. Do you even know who that is? Could be your web designer or your marketing guy. Feel free to change that right there, or leave it. You can customize your form’s email settings to be any way you like.
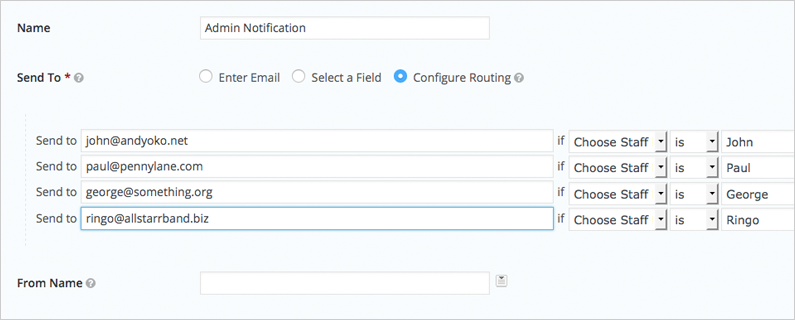
While editing your form, go to the Settings dropdown menu and choose Form Notifications. Select the notification you’d like to edit (it’s rare, but you might have more than one notification in a complicated form). Next, edit the Sent To settings. By default, it sends to the admin email. You can clear that and enter any email address you’d like. Or choose Configure Routing and add routing rules based on the responses chosen in your form.

Add form to your web page
Guys, we are all ready to go. Form built, form saved, notifications configured. Now your form needs a home. Building your own great web pages is a different post, but once you’ve got that going it’s easy to add your newly built form to the existing page. Look for the Add Form button above the formatting toolbar and follow the prompts to generate a shortcode that’s automatically added. Copy and paste this code into the location you want for your form and update the page to save your work.
Now that your form is published, it’s time to promote traffic to your appointment request page. Want some help with that? Roundpeg’s here to answer your questions and even take a load off your shoulders. Building forms if fun, but you shouldn’t have to do it all day when you’ve got a business to run. Our team does all that more. Call me at 317-569-1396 or use the gravity form below to send us a message or request a meeting.
Roundpeg is an Indianapolis web design firm.
got a project?
Whether you need a new website or some help with your social media we are ready to start the conversation.
