Gone are the days of remembering to bring the camera. Everyone carries a camera right in their pocket, unless you’re a member of the Stone Age and your poor, ancient cell phone lacks a camera feature.
But for the rest of us, the challenge is not getting a picture. The challenge is getting the RIGHT picture. A photo worthy of posting on social media should catch a viewer’s eye and wow your audience. This syndrome can be referred to as “photo-snobbery.” Your photo-snobbery yearns to have each awkward wall trimmed down and any unflattering colors removed. Not everyone is an image editing wizard, but everyone can use a few easy tricks to edit their photos using PowerPoint.
PowerPoint, you say? Yes, PowerPoint is an easy to use program which can readily help those who are beginning their bare-basic education in photo editing.
Crop
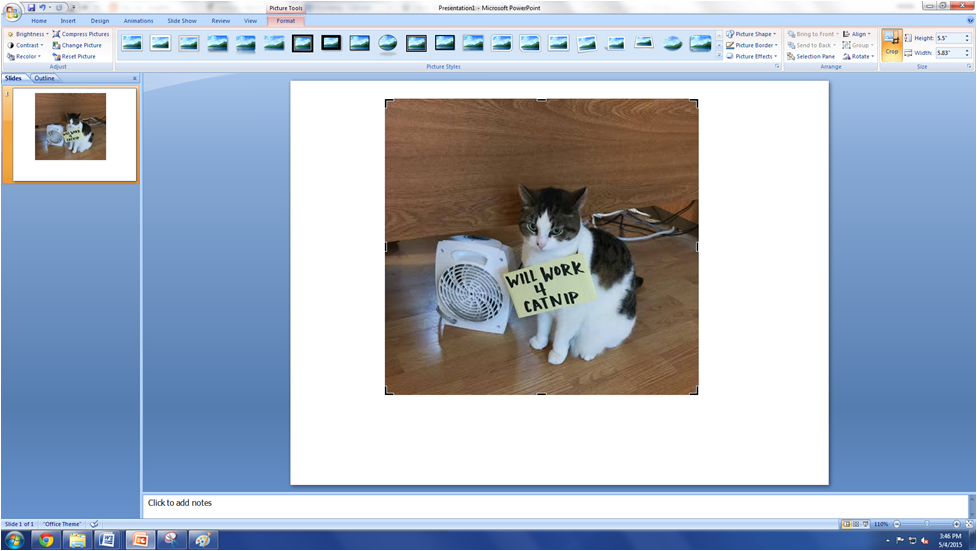
Crop can be your best friend or worst enemy. It’s your best friend when you have an awkward corner wall or misplaced object in your photo. PowerPoint proportionately cuts these objects out of your photo. Although, crop can be your worst enemy if you over crop a photo and end up with an awkward image size which doesn’t fit into pre-standardized photo boxes leaving extra white space all around the photo.

Black and White
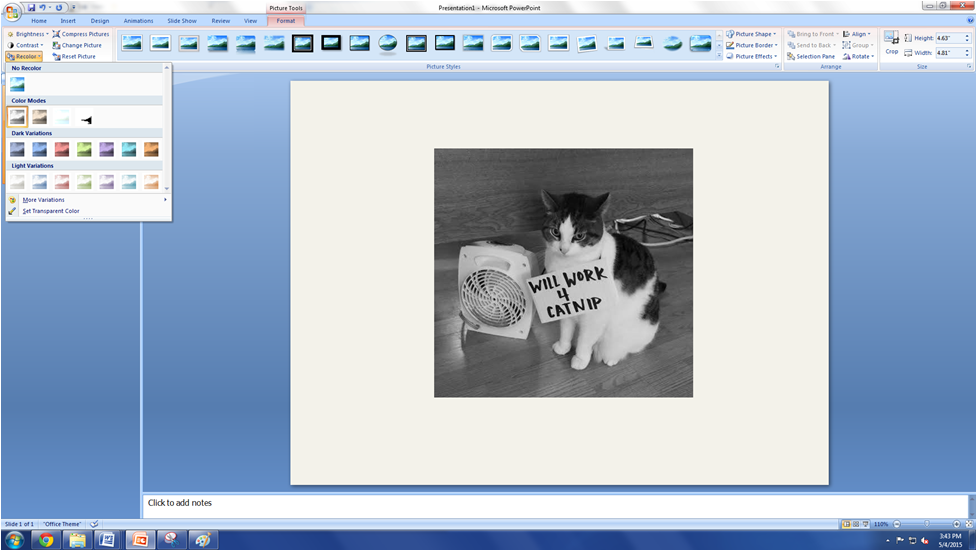
Sometimes you just want a striking black and white photo, they can be pretty powerful, but how you ask? Our pal PowerPoint has a grayscale option to see how the photo would work. In one-click, your entire photo can be transformed into a simplified black and white image. Also, this option is great for seeing how an image will print without color.

Before and After


Change File Type
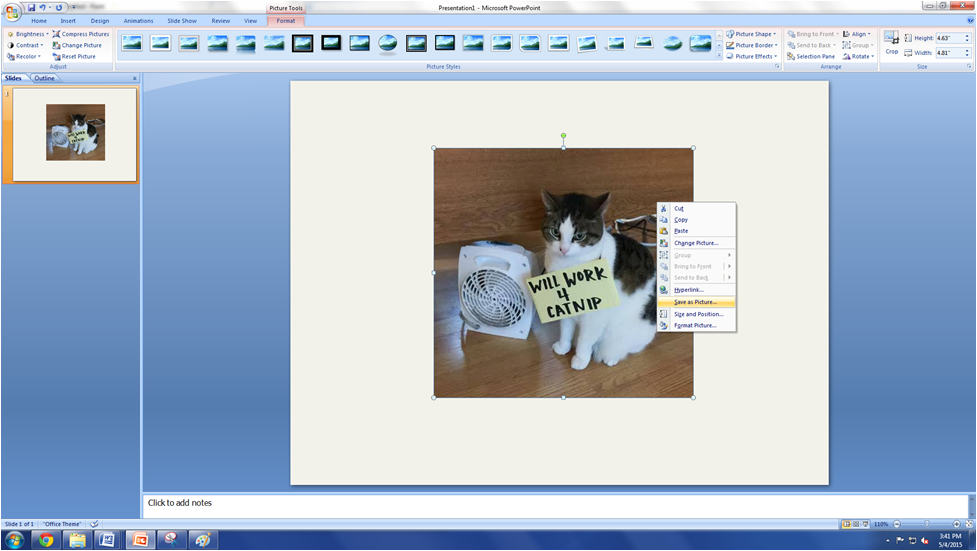
Changing the file type may be PowerPoint’s best photo editing feature. Some photo files just don’t download correctly in their original form and need to be converted into JPG or PNG. PowerPoint allows you to change the photo file nice and easy.
All you do is left click on the photo you have placed on the slide, then click save image as. At this point you will have a few options to change the file type and chose the one you were asked for. It’s quick, easy and saves many a headache.


PowerPoint is great for these quick and bare-basics editing functions. But please, please, please, pretty please do not send photos in a PowerPoint presentation. If you’re working with a marketing agency or other company, send your photos in a JPG or PNG file, not embedded into PowerPoint.
If you feeling ambitious from your new found image editing skills, go to the next level. PicMonkey is a free online photo editing tool. It has many ways to edit, tweak and change your photographs. One fun feature is entitled “Effects” and is signified with a magic wand. I don’t always recommend filters for your photography, but it’s entertaining to see how different effects can drastically change a photo.
Be Warned: These are very basic photo editing tools which can work for a social media post. When it comes to product shoots or more complicated editing, call in the experts. Graphic designers and professional photographers are paid to make your employee head shots or website photography top notch. PowerPoint is not a substitute for the talents of a trained professional.

